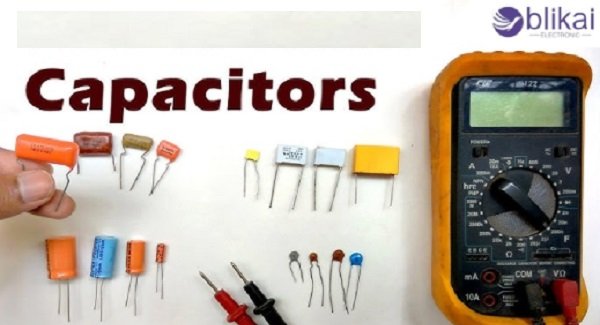
A ceiling fan that hums but won’t spin. An air conditioner that runs but doesn’t cool. A power supply board that keeps failing at random. In most of these situations, a faulty capacitor is the culprit — and the quickest way to confirm it is with a multimeter already sitting in most toolboxes. You don’t need an electronics degree to do this. What you need is the right method, the right settings, and a clear understanding of what the readings mean.
Safety First — Discharge Before You Touch Anything
Capacitors store electrical charge even after the circuit has been powered off. Large capacitors — the kind found in air conditioners, motor drives, and power supplies — can hold dangerous voltages for hours after shutdown. Touching the terminals of a charged capacitor without discharging it first can deliver a severe or potentially fatal electric shock.
Before doing anything else, follow these non-negotiable steps:
Step 1: Disconnect the device from all power sources completely. Switch off the circuit breaker if working on a fixed installation.
Step 2: Set your multimeter to DC voltage mode. Touch the probes to the capacitor terminals and check the reading. If it shows any significant voltage, the capacitor is still charged.
Step 3: Discharge the capacitor safely using a resistor — a 10kΩ to 100kΩ, 1-watt resistor held across the terminals for five to ten seconds works for most consumer electronics capacitors. For high-voltage capacitors in AC units or motor circuits, use a 20,000Ω, 5-watt resistor and hold it across the terminals for a full thirty seconds. Never short the terminals directly with a metal screwdriver or wire — this creates a dangerous spark and can damage components.
Step 4: Recheck with the voltmeter. Only when the reading drops below 1 volt is it safe to proceed.
Step 5: Remove the capacitor from the circuit completely. Testing with it still connected introduces interference from other components and produces inaccurate readings.
Method 1: Capacitance Mode — Most Accurate
Most modern digital multimeters include a dedicated capacitance measurement mode, identified on the dial by the symbol —|(— or the letter C. This is the most reliable way to test a capacitor.
Step 1: Set the multimeter dial to capacitance mode.
Step 2: For polarised capacitors — the cylindrical electrolytic type common in circuit boards — connect the red probe to the positive terminal (the longer lead, or the side marked with a + symbol) and the black probe to the negative terminal.
Step 3: Wait a few seconds for the reading to stabilise. The display shows the measured capacitance value in microfarads (µF) or picofarads (pF).
Step 4: Compare the reading against the rated value printed on the capacitor body itself.
Interpreting the result: A healthy capacitor reads within 10–20% of its rated value. A 100µF capacitor reading between 80µF and 120µF is functioning normally. A reading significantly below the rated value indicates the capacitor has lost capacitance — it’s degraded and should be replaced. A reading of zero, OL (overload), or no reading at all indicates an open circuit — the capacitor is dead. A very low resistance reading in this mode suggests a short circuit inside the component.
Method 2: Resistance Mode — When Capacitance Mode Isn’t Available
If your multimeter doesn’t have a dedicated capacitance mode, the resistance (ohmmeter) method gives a good indication of whether a capacitor is functional, shorted, or open.
Step 1: Set the multimeter to resistance mode — select a range around 1kΩ.
Step 2: Connect the probes to the capacitor terminals, respecting polarity on polarised capacitors.
Step 3: Watch the display carefully.
What you should see on a working capacitor: On a digital multimeter, the resistance reading starts low, climbs steadily as the capacitor charges from the meter’s internal battery, and then settles at a very high value (close to infinity or OL). This charging behaviour confirms the capacitor can hold a charge.
What a faulty capacitor shows: If the reading immediately jumps to near zero and stays there, the capacitor is shorted internally. If the reading immediately shows infinity or OL with no initial climb, the capacitor is open — it cannot charge at all and is effectively dead.
Visual Inspection — Before You Even Pick Up the Multimeter
Before any electrical testing, simply look at the capacitor. Many failed capacitors announce themselves visually.
A bulging or domed top on an electrolytic capacitor is the clearest sign of failure — the internal pressure from electrolyte breakdown causes the casing to swell. A cracked or split casing, brown residue or burn marks around the base, or leaked electrolyte visible on the circuit board beneath the component are all definitive signs of failure. If you see any of these, the capacitor needs replacement regardless of what the multimeter says.
Interpreting Results at a Glance
| Reading | What It Means |
| Within 10–20% of rated value | Capacitor is healthy |
| Significantly below rated value | Capacitor has degraded — replace |
| Zero or near-zero resistance | Internal short circuit — replace |
| Immediate OL with no charge | Open circuit — capacitor is dead |
| Resistance climbs then stabilises high | Working correctly (resistance mode) |
5 FAQs
Q: Do I need to remove the capacitor from the circuit before testing?
A: Yes. Testing in-circuit produces inaccurate readings because other components interfere with the measurement. Always remove it first.
Q: What does OL mean on my multimeter when testing a capacitor?
A: OL means overload or out of range. In capacitance mode, it indicates the capacitor is either faulty or its value exceeds the meter’s measurement range. In resistance mode, it means the capacitor is open or fully charged.
Q: Can I test a capacitor with a basic multimeter that has no capacitance mode?
A: Yes. Use resistance mode and observe whether the reading climbs gradually then settles high — that behaviour confirms a working capacitor.
Q: Is it dangerous to test a capacitor from an air conditioner?
A: Yes, if not properly discharged first. AC capacitors hold high voltages. Always discharge using a properly rated resistor and verify voltage is near zero before touching.
Q: How do I know which terminal is positive on a capacitor?
A: On electrolytic capacitors, the longer lead is positive. The negative side is also marked with a stripe and minus symbols along the casing.